Ubuntu环境下如何搭建FTP服务器
今天小编给大家分享一下Ubuntu环境下如何搭建FTP服务器的相关知识点,内容详细,逻辑清晰,相信大部分人都还太了解这方面的知识,所以分享这篇文章给大家参考一下,希望大家阅读完这篇文章后有所收获,下面我们一起来了解一下吧。
安装ftp
安装ftp:
sudo apt-get update
sudo apt-get install vsftpd
检查ftp是否安装:
vsftpd --version
更改配置文件
注意使用sudo命令获得root权限
打开配置文件:
sudo vim /etc/vsftpd.conf
做如下更改:
# example config file /etc/vsftpd.conf
#
# the default compiled in settings are fairly paranoid. this sample file
# loosens things up a bit, to make the ftp daemon more usable.
# please see vsftpd.conf.5 for all compiled in defaults.
#
# read this: this example file is not an exhaustive list of vsftpd options.
# please read the vsftpd.conf.5 manual page to get a full idea of vsftpd's
# capabilities.
#
#
# run standalone? vsftpd can run either from an inetd or as a standalone
# daemon started from an initscript.
listen=no
#
# this directive enables listening on ipv6 sockets. by default, listening
# on the ipv6 "any" address (::) will accept connections from both ipv6
# and ipv4 clients. it is not necessary to listen on *both* ipv4 and ipv6
# sockets. if you want that (perhaps because you want to listen on specific
# addresses) then you must run two copies of vsftpd with two configuration
# files.
listen_ipv6=yes
#
# allow anonymous ftp? (disabled by default).
anonymous_enable=no
#
# uncomment this to allow local users to log in.
local_enable=yes
#
# uncomment this to enable any form of ftp write command.
write_enable=yes
#
# default umask for local users is 077. you may wish to change this to 022,
# if your users expect that (022 is used by most other ftpd's)
local_umask=022
#
# uncomment this to allow the anonymous ftp user to upload files. this only
# has an effect if the above global write enable is activated. also, you will
# obviously need to create a directory writable by the ftp user.
#anon_upload_enable=yes
#
# uncomment this if you want the anonymous ftp user to be able to create
# new directories.
#anon_mkdir_write_enable=yes
#
# activate directory messages - messages given to remote users when they
# go into a certain directory.
dirmessage_enable=yes
#
# if enabled, vsftpd will display directory listings with the time
# in your local time zone. the default is to display gmt. the
# times returned by the mdtm ftp command are also affected by this
# option.
use_localtime=yes
#
# activate logging of uploads/downloads.
xferlog_enable=yes
#
# make sure port transfer connections originate from port 20 (ftp-data).
connect_from_port_20=yes
#
# if you want, you can arrange for uploaded anonymous files to be owned by
# a different user. note! using "root" for uploaded files is not
# recommended!
#chown_uploads=yes
#chown_username=whoever
#
# you may override where the log file goes if you like. the default is shown
# below.
xferlog_file=/var/log/vsftpd.log
#
# if you want, you can have your log file in standard ftpd xferlog format.
# note that the default log file location is /var/log/xferlog in this case.
xferlog_std_format=yes
#
# you may change the default value for timing out an idle session.
#idle_session_timeout=600
#
# you may change the default value for timing out a data connection.
#data_connection_timeout=120
#
# it is recommended that you define on your system a unique user which the
# ftp server can use as a totally isolated and unprivileged user.
#nopriv_user=ftpsecure
#
# enable this and the server will recognise asynchronous abor requests. not
# recommended for security (the code is non-trivial). not enabling it,
# however, may confuse older ftp clients.
#async_abor_enable=yes
#
# by default the server will pretend to allow ascii mode but in fact ignore
# the request. turn on the below options to have the server actually do ascii
# mangling on files when in ascii mode.
# beware that on some ftp servers, ascii support allows a denial of service
# attack (dos) via the command "size /big/file" in ascii mode. vsftpd
# predicted this attack and has always been safe, reporting the size of the
# raw file.
# ascii mangling is a horrible feature of the protocol.
#ascii_upload_enable=yes
#ascii_download_enable=yes
#
# you may fully customise the login banner string:
ftpd_banner=welcome to blah ftp service.
#
# you may specify a file of disallowed anonymous e-mail addresses. apparently
# useful for combatting certain dos attacks.
#deny_email_enable=yes
# (default follows)
#banned_email_file=/etc/vsftpd.banned_emails
#
# you may restrict local users to their home directories. see the faq for
# the possible risks in this before using chroot_local_user or
# chroot_list_enable below.
#chroot_local_user=yes
#
# you may specify an explicit list of local users to chroot() to their home
# directory. if chroot_local_user is yes, then this list becomes a list of
# users to not chroot().
# (warning! chroot'ing can be very dangerous. if using chroot, make sure that
# the user does not have write access to the top level directory within the
# chroot)
chroot_local_user=yes
chroot_list_enable=yes
# (default follows)
chroot_list_file=/etc/vsftpd.chroot_list
#
# you may activate the "-r" option to the builtin ls. this is disabled by
# default to avoid remote users being able to cause excessive i/o on large
# sites. however, some broken ftp clients such as "ncftp" and "mirror" assume
# the presence of the "-r" option, so there is a strong case for enabling it.
#ls_recurse_enable=yes
#
# customization
#
# some of vsftpd's settings don't fit the filesystem layout by
# default.
#
# this option should be the name of a directory which is empty. also, the
# directory should not be writable by the ftp user. this directory is used
# as a secure chroot() jail at times vsftpd does not require filesystem
# access.
secure_chroot_dir=/var/run/vsftpd/empty
#
# this string is the name of the pam service vsftpd will use.
pam_service_name=ftp
#
# this option specifies the location of the rsa certificate to use for ssl
# encrypted connections.
rsa_cert_file=/etc/ssl/certs/ssl-cert-snakeoil.pem
rsa_private_key_file=/etc/ssl/private/ssl-cert-snakeoil.key
ssl_enable=no

#
# uncomment this to indicate that vsftpd use a utf8 filesystem.
utf8_filesystem=yes
退出编辑模式后,使用:wq保存退出vim.
创建ftp用户
此处的操作需要使用root权限,若操作被拒绝,使用sudo:
sudo mkdir /home/ftpdir
sudo useradd ftpdir -d /home/ftpdir -m
sudo passwd ftpdir
sudo mkdir /home/ftpdir/ftp
sudo chmod 777 -r /home/ftpdir/ftp
usermod -s /sbin/nologin ftpdir
配置完成后,添加用户:
sudo vim /etc/vsftpd.chroot_list
将ftpdir添加在文件中。
ftpdir
到此为止,整个ftp的搭建过程就完成了,接下来就是关于如何去使用了。
启动或者重启ftp
启动或者重启ftp:
service vsftpd startservice vsftpd restart
查看ftp状态:
service vsftpd status
若要关闭ftp服务,可以使用如下命令:
service vsftpd stop
查看服务器ip
打开命令端
robot@robot:~$ ifconfig
enp4s0f2 link encap:ethernet hwaddr 74:d0:2b:ec:fa:f9
   up broadcast multicast mtu:1500 metric:1
   rx packets:0 errors:0 dropped:0 overruns:0 frame:0
   tx packets:0 errors:0 dropped:0 overruns:0 carrier:0
   collisions:0 txqueuelen:1000
   rx bytes:0 (0.0 b) tx bytes:0 (0.0 b)

lo  link encap:local loopback
   inet addr:127.0.0.1 mask:255.0.0.0
   inet6 addr: ::1/128 scope:host
   up loopback running mtu:65536 metric:1
   rx packets:12840 errors:0 dropped:0 overruns:0 frame:0
   tx packets:12840 errors:0 dropped:0 overruns:0 carrier:0
   collisions:0 txqueuelen:1000
   rx bytes:1174976 (1.1 mb) tx bytes:1174976 (1.1 mb)

wlp3s0 link encap:ethernet hwaddr 24:fd:52:85:42:0c
   inet addr:192.168.1.110 bcast:192.168.1.255 mask:255.255.255.0
   inet6 addr: fe80::c13c:b38e:69c7:cdf2/64 scope:link
   up broadcast running multicast mtu:1500 metric:1
   rx packets:99764 errors:0 dropped:0 overruns:0 frame:0
   tx packets:95225 errors:0 dropped:0 overruns:0 carrier:0
   collisions:0 txqueuelen:1000
   rx bytes:98718687 (98.7 mb) tx bytes:14326894 (14.3 mb)
由于此处连接的是wifi,因此在wlp3s0这里找到对应的ip地址为192.168.1.110(如果连接网线则在第一段找ip,每台电脑的配置都不一样,可根据实际情况考虑)
登陆
使用filezilla或者打开文件管理器输入ftp://ipaddress
打开计算机,输入服务器的ip地址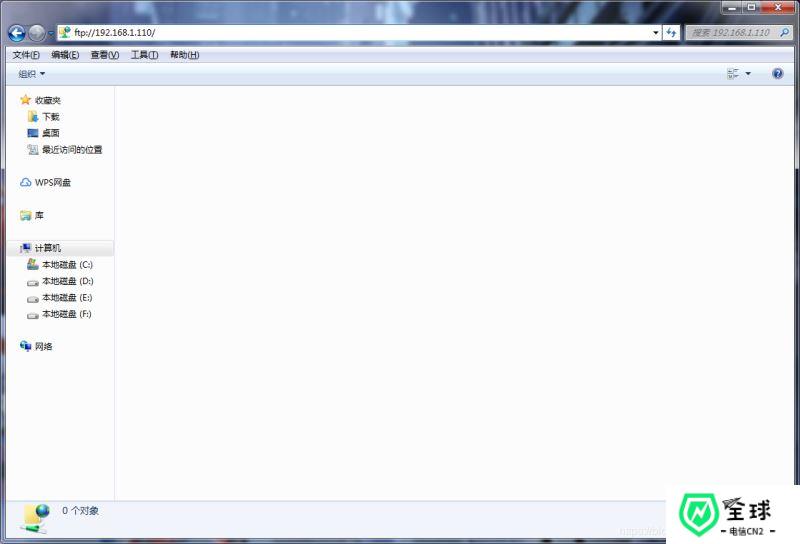
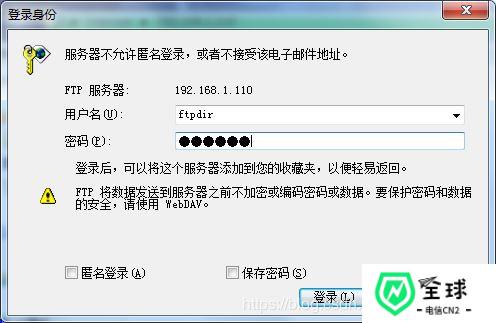
输入用户名和密码,此处使用的用户名为ftpdir,密码为123456
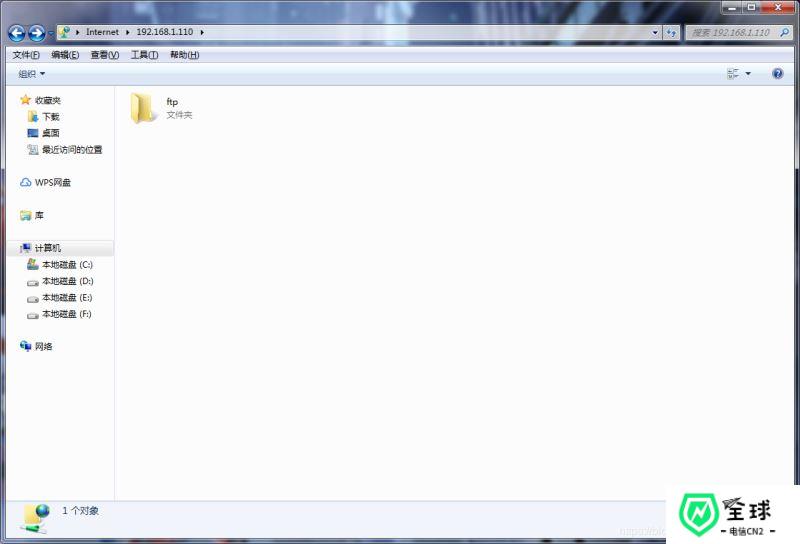
最后就可以看到服务器上的创建的文件夹了。
ubuntu上文件位置
在完成ftp服务器的搭建和测试工作后,文件存放在服务哪里呢,怎么找到这些文件?
在创建用户那一节,在/home目录这里创建了ftpdir文件夹,ftpdir文件夹里创建了一个可读可写的文件夹ftp,在之后的文件传输中,可以切换到ftp文件夹中寻找文件,此处操作需要使用sudo获取权限。
robot@robot:~$ cd /home/ftpdir/ftp
robot@robot:/home/ftpdir/ftp$ ls
魔方.zip
以上就是“Ubuntu环境下如何搭建FTP服务器”这篇文章的所有内容,感谢各位的阅读!相信大家阅读完这篇文章都有很大的收获,小编每天都会为大家更新不同的知识,如果还想学习更多的知识,请关注美国cn2行业资讯频道。